
Handmade Felt Christmas Decorations
Looking for a quick and easy Christmas crafting idea?
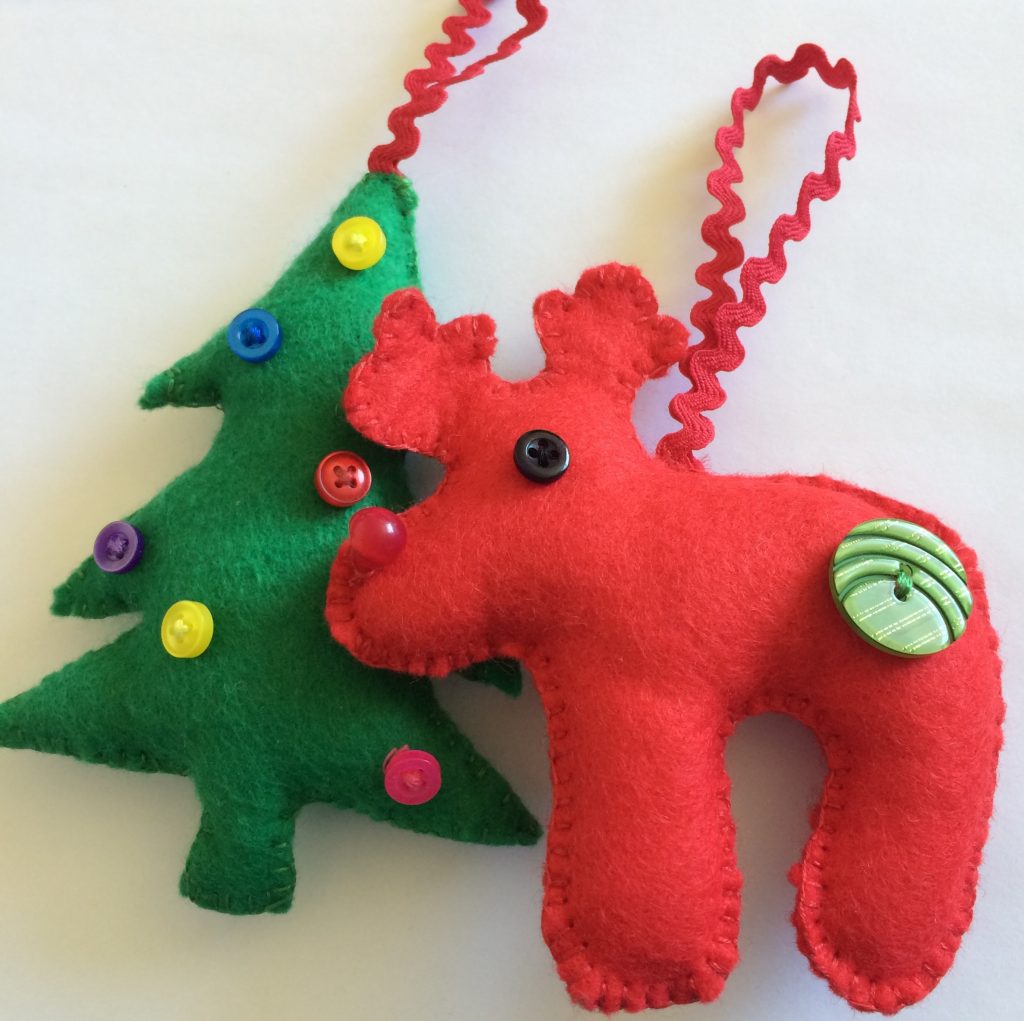
These felt decorations are simple and affordable to make and you only need a few things to get started! The best thing about these is that they are so versatile, they make great gifts or of course you can make them to decorate your home or Christmas tree!
All it takes is a handful of items and SIX simple steps!
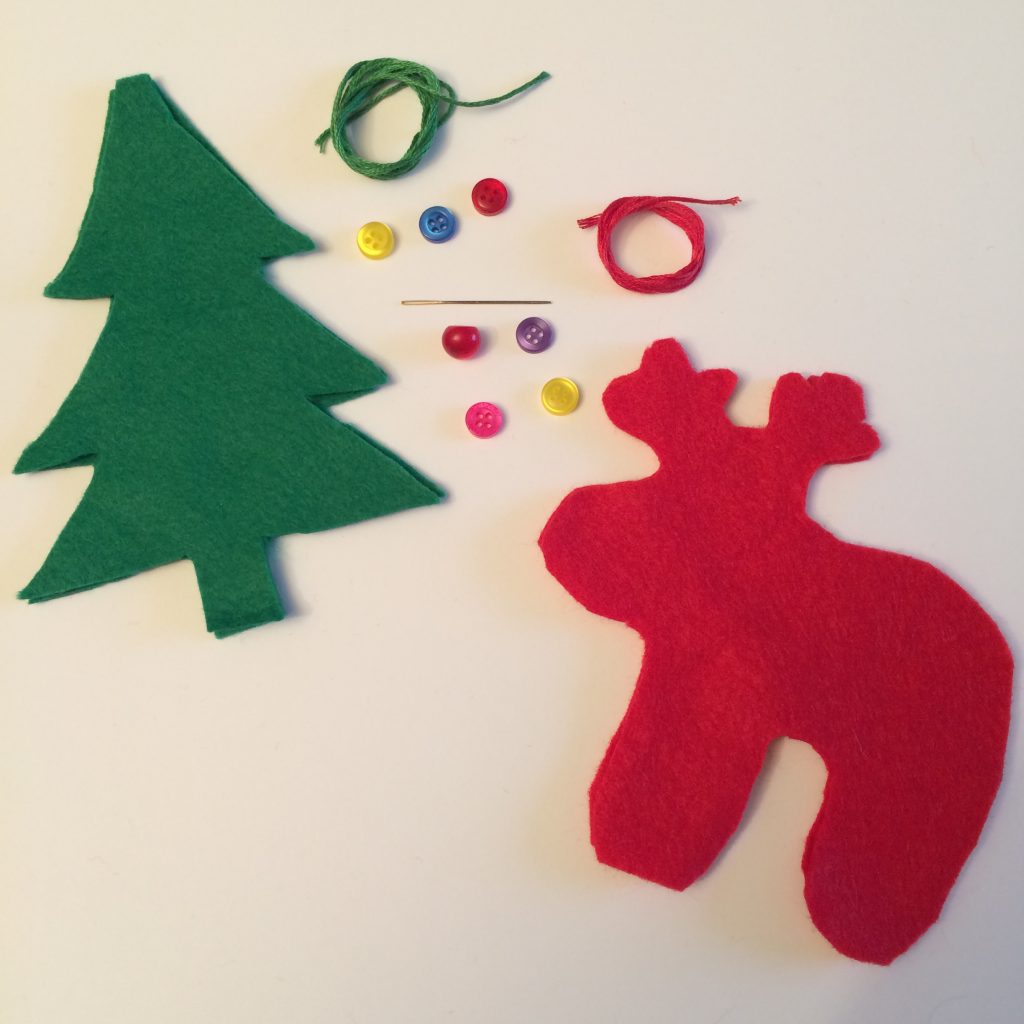
What you need (per ornament):
- Felt (approx A5 size)
- Scissors
- Pins
- Needle and thread
- Stuffing
- Buttons, ribbon, other decorative elements
- Ribbon
- Paper (the same size as your felt and a pen/pencil
How do you make them?
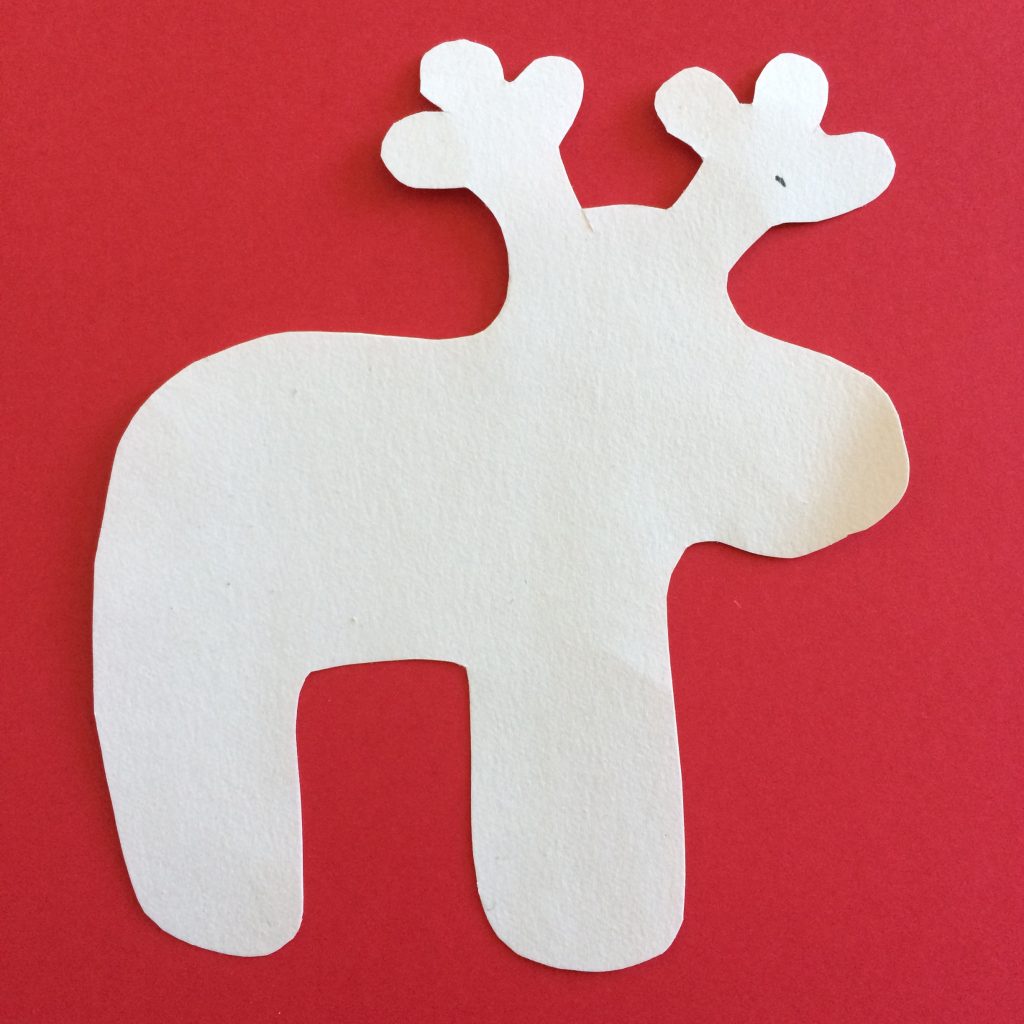
Step 1: Fold your paper in half, draw out the shape of the design you want and cut it out. If it seems too small, repeat this step until you find a template you are happy with. Keep it simple.
You can make simple circles by drawing around a cup, or festive shapes like trees or stars. Bear in mind that you are going to be stuffing your ornament, so make your design on the larger side.
Step 2: Fold your felt in half, or cut into two pieces and repeat, Pin your template to your fabric. Cut around your design.
You can draw around your paper template if you like; I would recommend doing this on the reverse side so that any pen or pencil marks don’t show, so simply flip your image over.
You should now have two identical shaped felt pieces. You can even them out at this point if necessary.
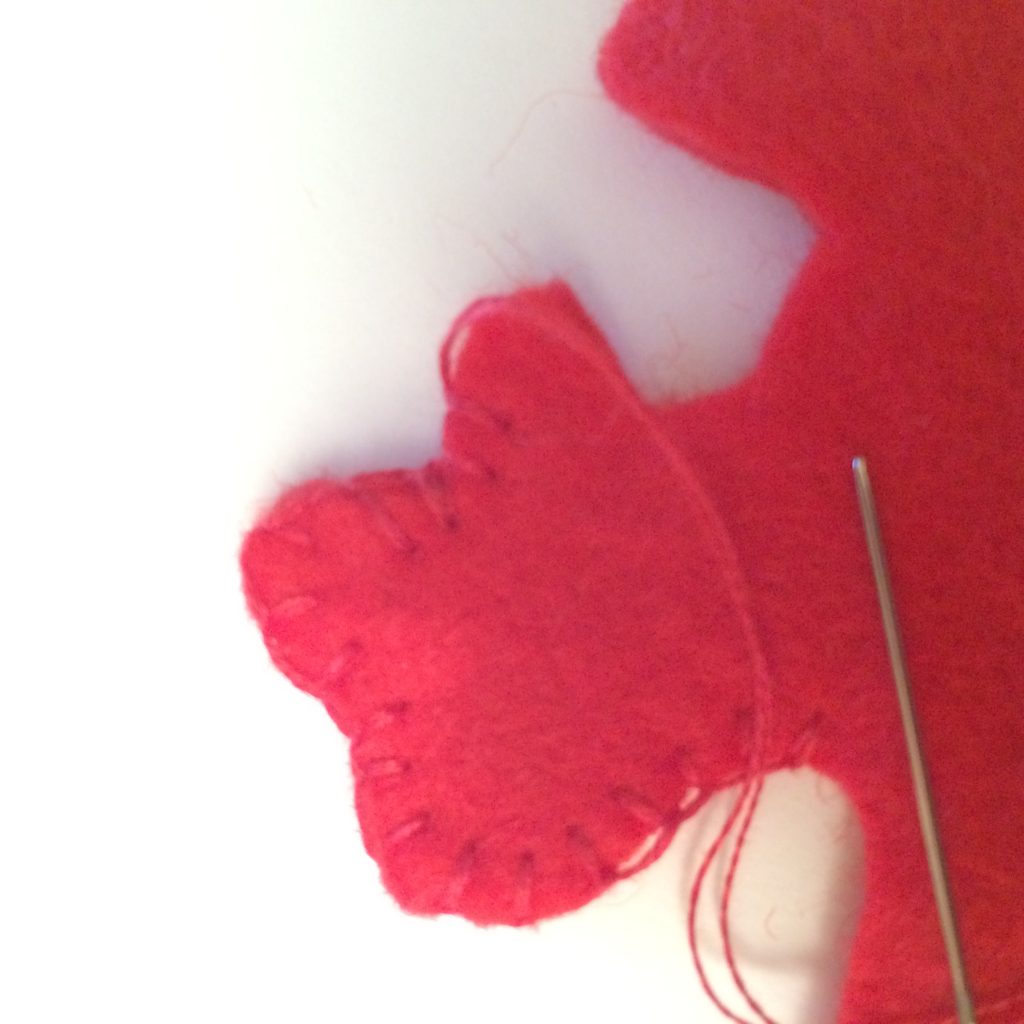
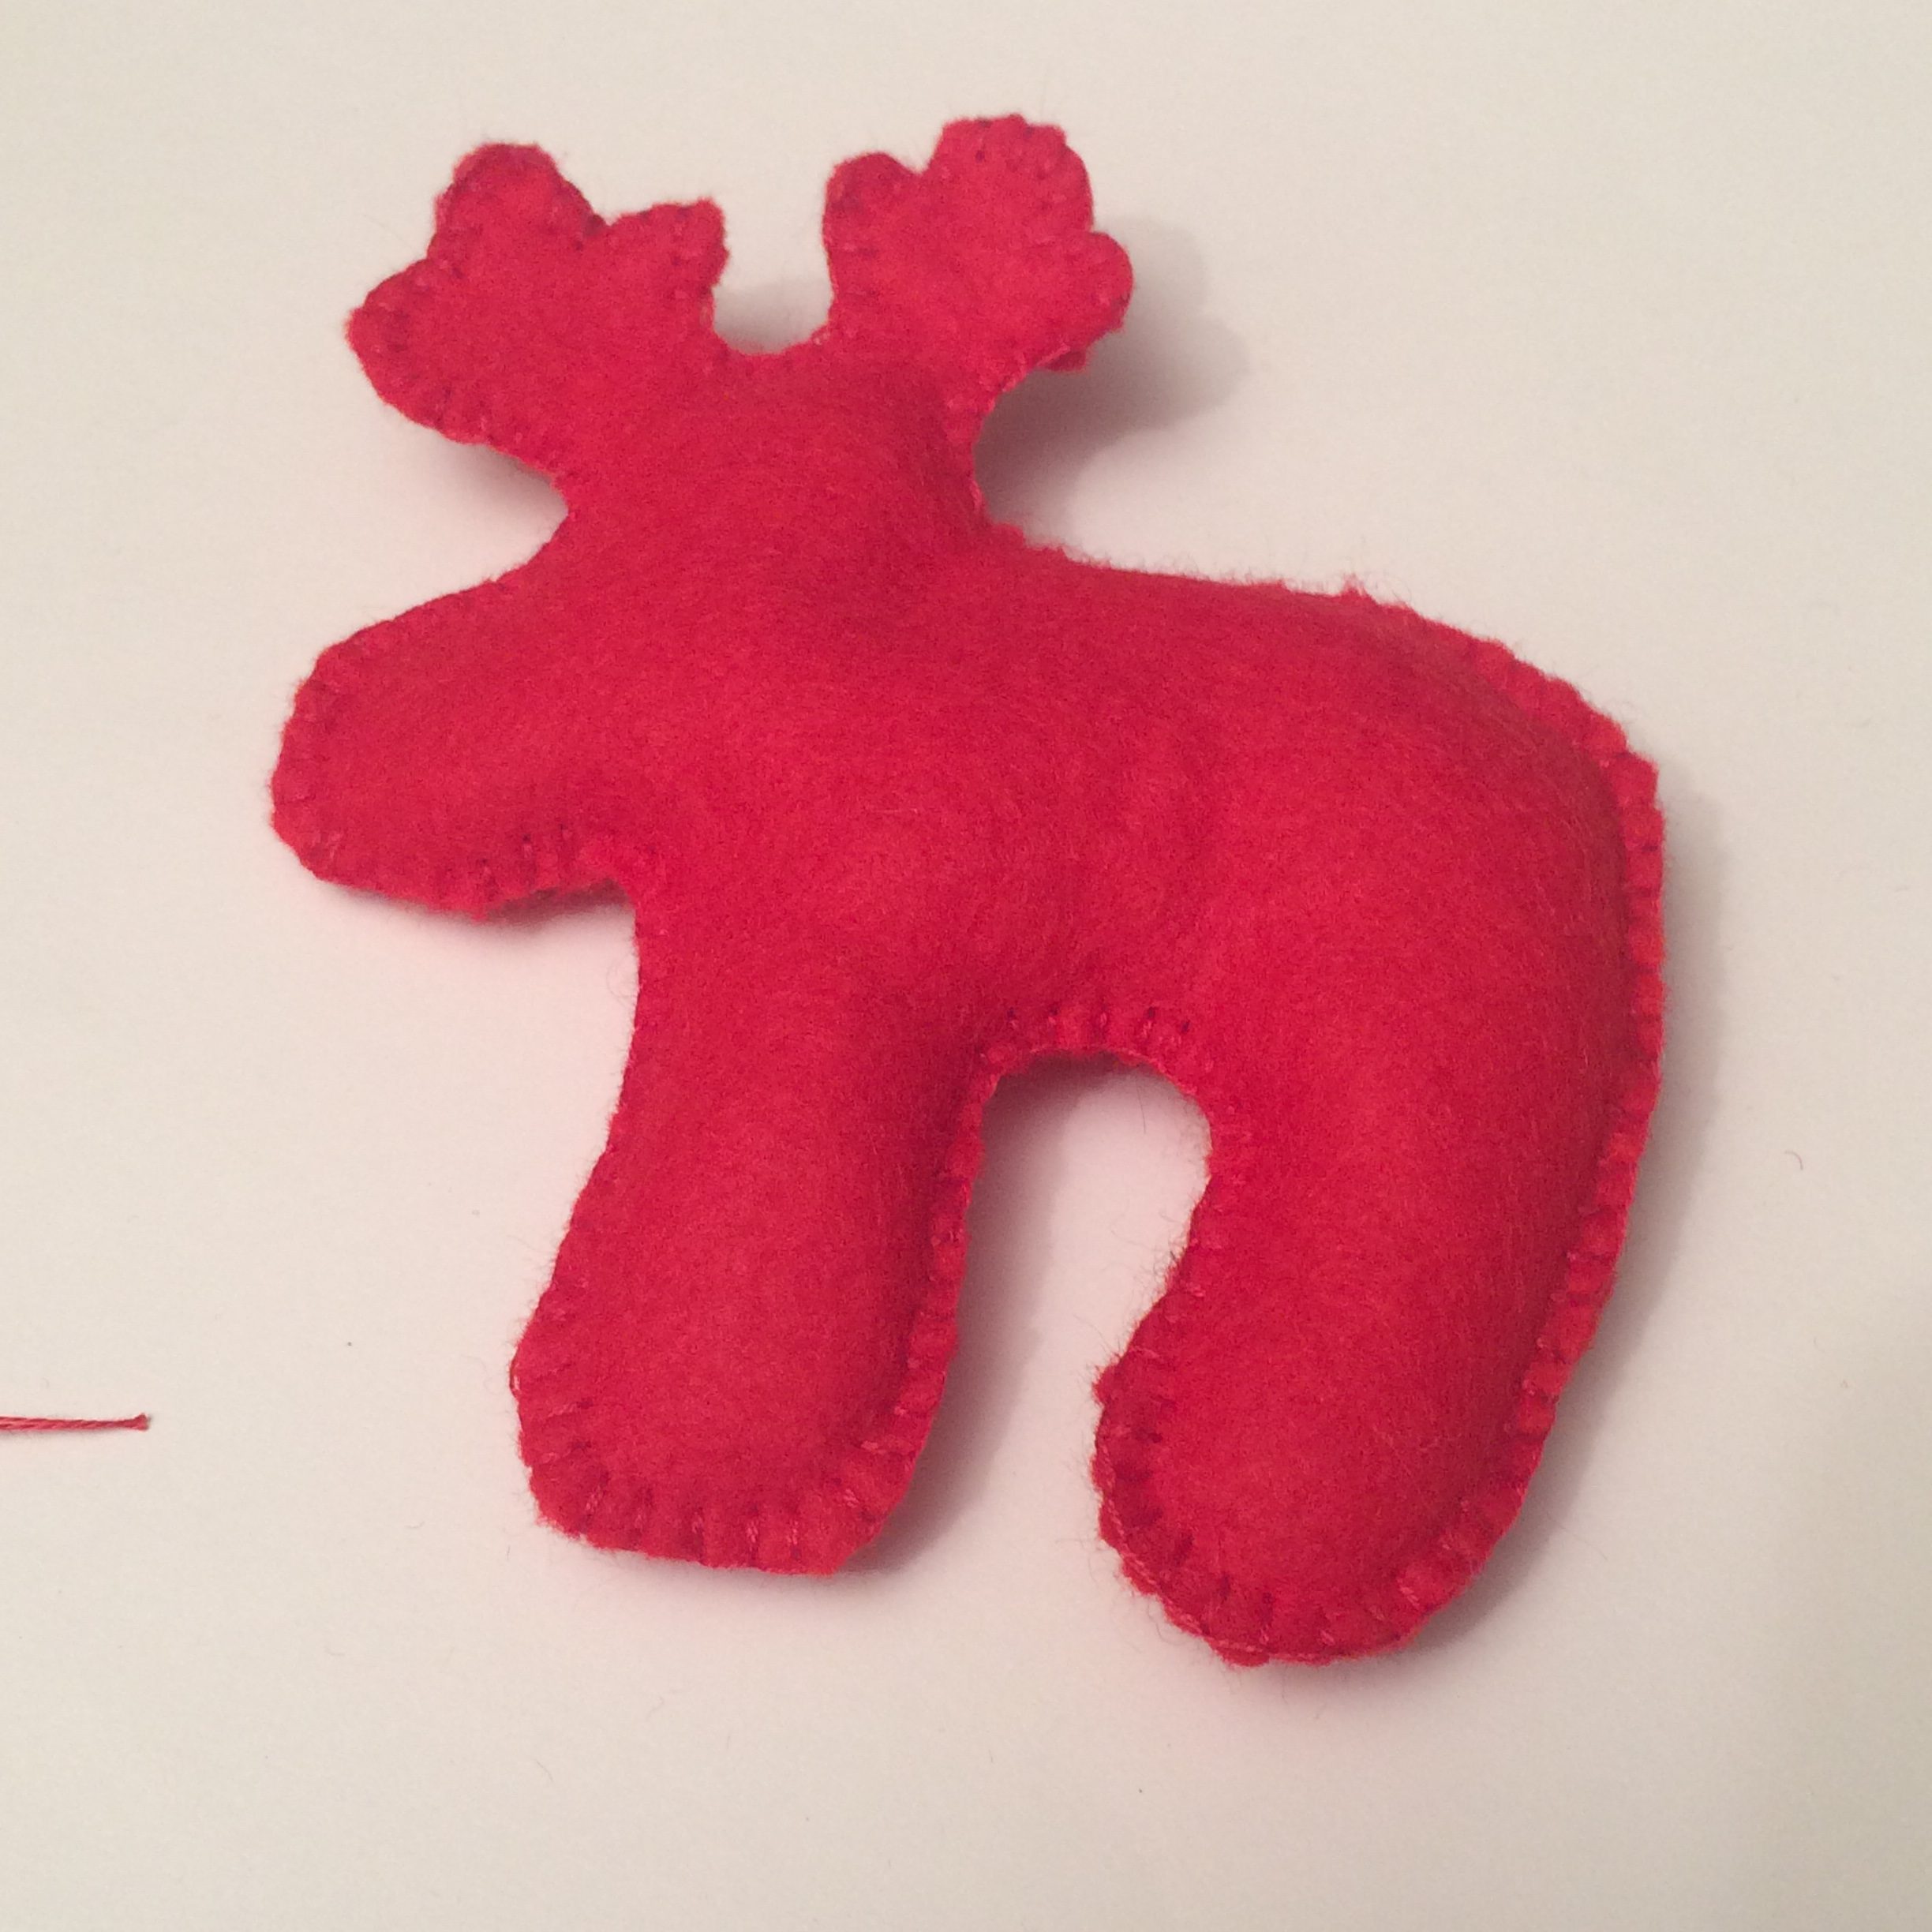
Step 3: Knot one end of your thread and sew through one piece of felt “inside” to “outside”. This will secure your thread. Sew around the outside edge of your shapes, joining them together using blanket stitch.
Leave a section of your top edge free as this is where you will add a hanging loop, and fill with your stuffing.
At the end, or if you need to change thread simply discreetly knot your thread on the inside, and repeat, if you don’t need to cut your thread keep your tail clear for step 4.
Blanket stitch tip: Draw two lines on your finger as a guide, to keep your stitches even.
Step 4: Using small pieces of stuffing fill your ornament until you are happy with it, use a pointy tool or pencil to get the stuffing into any hard to reach spaces.
(I use wadding, but you can use scrap fabric cut into pieces, or stuffing from an old [clean] pillow)
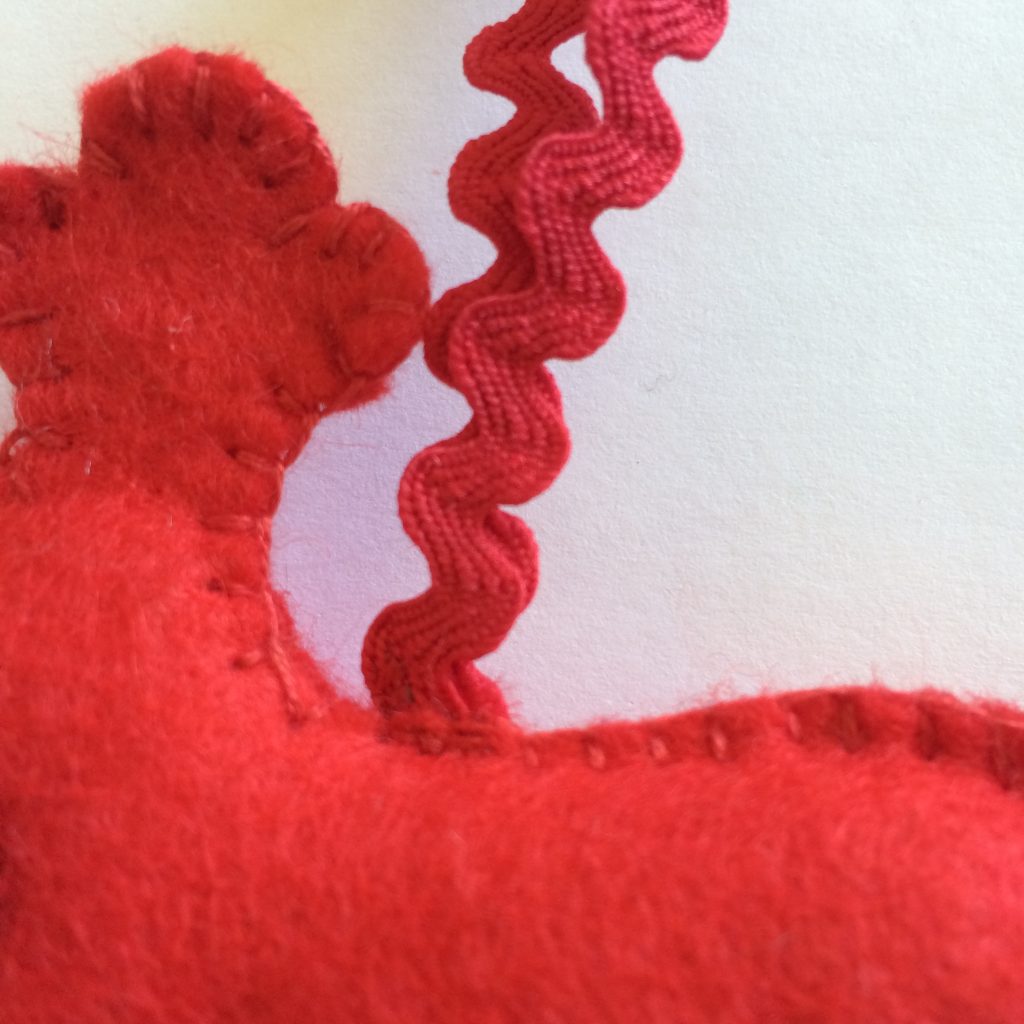
Step 5: Using your needle hold it through the top of your ornament (holding the pieces together, to find the “hanging point” this is simpler with basic shapes, but you may have to work a little harder with more complex shapes to find an even point for the weight to hang well.
Once you are happy, as with Step 3, sew your remaining edge closed, continue with blanket stitch, until sewing in your piece of looped ribbon with back-stitch for hanging. You can go over these stitches a little more to secure your ribbon if necessary. Finish any blanket stitching. Knot the end of your thread discreetly and trim any excess.
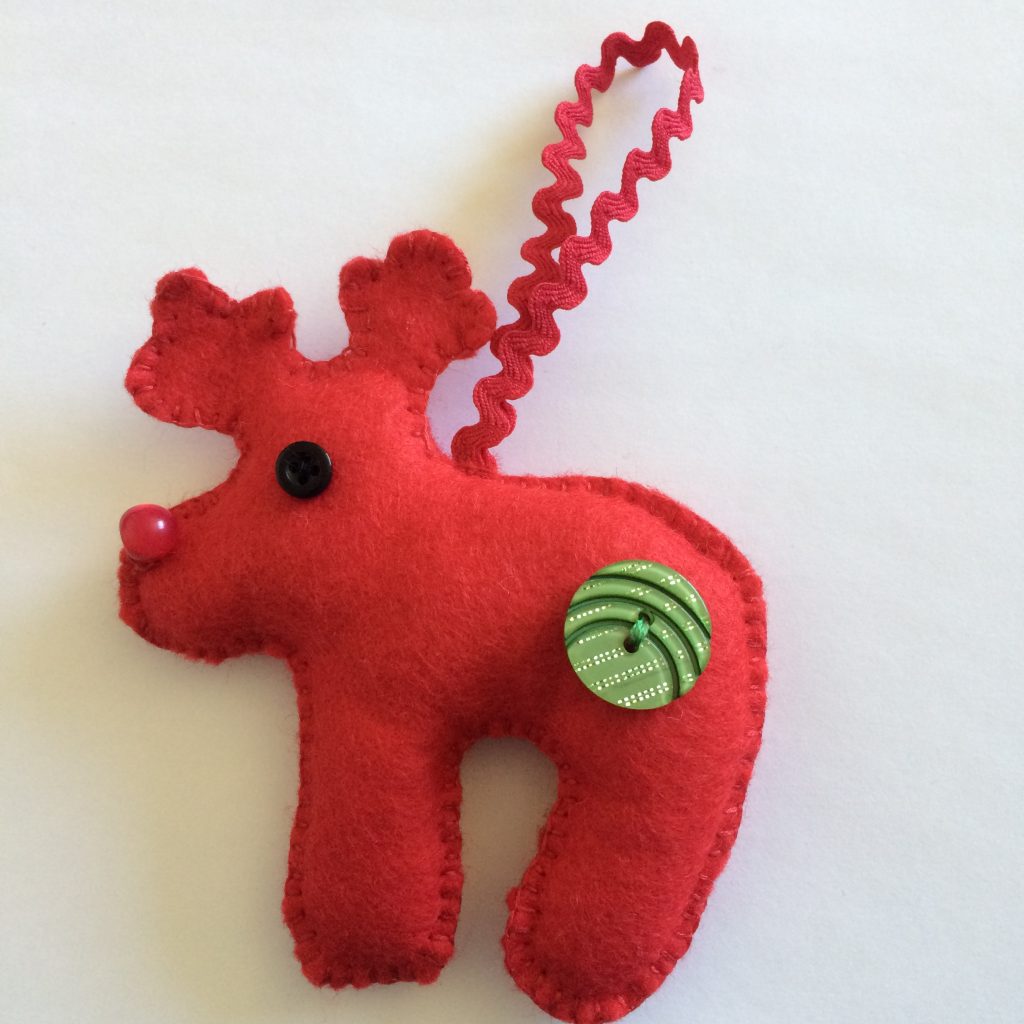
Step 6: Finally; using buttons or any other embellishments, decorate your ornament. Simply sew through the front layer of felt and discreetly knot your thread behind any decorative elements.
Some Alternatives:
If you want a sewing-free decorative method, or are making these with children, you could use glue to add any decorative elements.
Some stores sell pre-printed and glitter felt.
You could embroider a design onto your felt after step 2 and then continue on to step 3.
Changing up the fabric and stuffing materials, you can also use the above method to make many year-round gifts, such as shaped bunting, toys and lavender pillows!
Kay is a craft and lifestyle blogger from Cornwall, UK. She can be found on her blog Kay at Home where she shares her own personal craft projects, product reviews, local days out and more.

Leave a Reply